How To Check Your Cambelt And How To Replace It
We might be purveyors of second-hand cars, but we consider road safety and insight to be just as important. Considered to be one of the most important parts of your car’s engine, the cambelt helps your complex engine run smoothly and with ease. If your cambelt snaps, it can be very dangerous. It is also an expense that you could easily avoid. It would benefit you and your car in the long run if you know how to check your cambelt or replace it.
Without further adieu, allow Auto Pedigree to walk you through checking and replacing your cambelt.
How The Cambelt Works
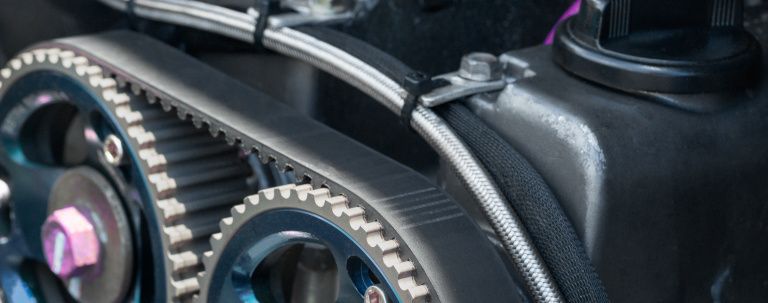
Put simply, the piece of rubber connecting the top and bottom parts of your engine is called the cambelt. It ensures that the camshaft, crankshaft and valves are all working together well. The belt is equipped with ridged proportions or “teeth” shifting the attached shaft along.
Check For Shiny Rubber
The first tell-sign of a worn cambelt is shiny rubber. The rubber may become shiny when overstressed, indicating its likelihood to snap at any given moment.
Check For Peeling Rubber
Much like all wear and tear, peeling rubber is indicative of a faulty cambelt. It means that the rubber band is on its way downhill and could use maintenance sooner rather than later. This is a sure sign that your cambelt is due for replacement.
Check For Cracked Rubber
We all know that cracked rubber is bad news. Easily snapped or broken, cracked rubber is generally due to age and long-term damage. If you find that yours is showing cracks, make some time to replace it sooner rather than later.
Slack Rubber
There should be a moderate amount of tension on the rubber belt when it is in motion, so loose rubber is a cause for concern.
Ridge Check On The Cambelt
The final point for observation would be the “teeth” around the cambelt, as they endure the gradual degradation of continuous use. They can be worn down to almost nothing, so they are a pretty accurate indication of your cambelt health.
How To Change Your Cambelt
Start by jacking up your car and loosening the bolts. Slide the belt out of the way and loosen the crankshaft pulley. Then, remove the motor mount brackets and loosen the bolts or screws. You should be able to see the cambelt at this point. Loosen the tensioner cog, push down on the spring and move it downwards. You should be able to remove the cambelt at this point.
Upon loosening the tensioner cog, it should drop back into place, which should re-tension the new belt. You can now put the rest of the pieces - camshaft, crankshaft and pulley - back together.
It’s important to note that it is best to consult a mechanic to make the assessment and to change your cambelt for you. But it’s always good to know what the warning signs are and to have the knowledge of how to fix it yourself.
Safety comes first when you’re on the road, so please consult a mechanic if you are uncertain about any of the above. Browse through our collection of second-hand cars to find one to practice your newfound skills on.